Flight Controller Board Orientation
Every flight controller has an arrow printed on it, and the firmware assumes that arrow points at the nose. Mount the board any other way and every gyro and accelerometer reading arrives rotated — the aircraft believes it is tilting left when it is tilting forward, and no amount of tuning fixes that.
Airframes do not always cooperate. A stack that has to go in sideways to clear a battery strap, or upside down under a top plate, is a normal situation. The fix is to tell the firmware how the board actually sits.
Board orientation rotates the readings that the entire attitude estimate is built on. A wrong value does not produce a small error — it produces an aircraft that corrects in the wrong axis and flips on takeoff. Check it on the bench: tilt the aircraft nose-down and confirm the horizon in your ground station pitches the same way.
Board orientation is not compass orientation
These get confused constantly, and the consequences are very different.
| Board orientation | Compass orientation | |
|---|---|---|
| Describes | how the flight controller is mounted | how an external magnetometer is mounted |
| Affects | gyro and accelerometer — the whole attitude estimate | heading only |
| Symptom when wrong | flips on takeoff, corrects in the wrong axis | heading off by a constant angle, circling in position hold |
| ArduPilot parameter | AHRS_ORIENTATION | COMPASS_ORIENT |
| PX4 setting | Autopilot Orientation | Mag Orientation |
If the compass inside a GPS module is what you are trying to set, you want External Compass Orientation instead.
ArduPilot
The parameter is AHRS_ORIENTATION.
- Connect the flight controller in Mission Planner.
- Open the Full Parameter List and find
AHRS_ORIENTATION. - Set the value that matches how the board is mounted.
- Click Write Params.
- Power-cycle the flight controller and reconnect.
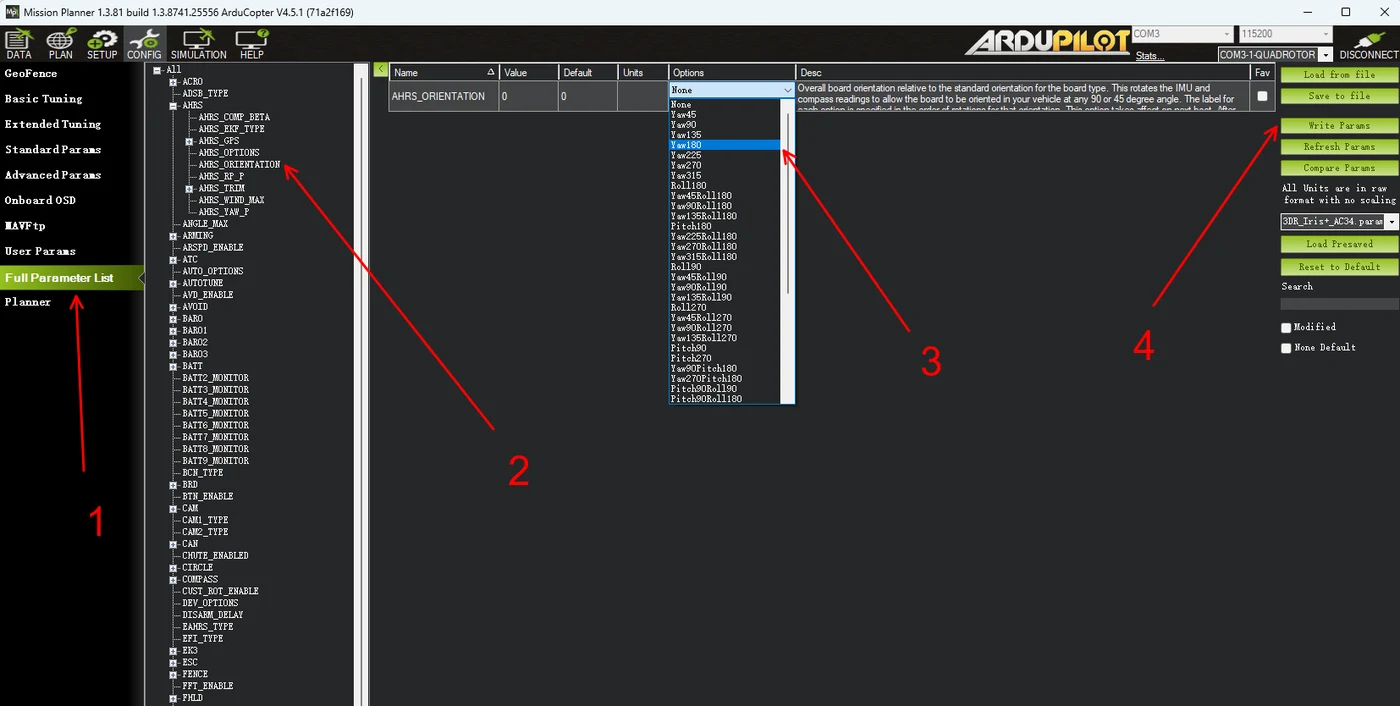
The value is chosen from a list of named rotations. The common ones:
| Value | Name | Board is… |
|---|---|---|
| 0 | None | mounted normally, arrow to the nose |
| 2 | Yaw90 | rotated 90° clockwise |
| 4 | Yaw180 | rotated 180°, arrow to the tail |
| 6 | Yaw270 | rotated 270° clockwise |
| 8 | Roll180 | upside down, arrow still to the nose |
| 12 | Pitch180 | upside down, arrow to the tail |
The full list also covers 45° steps (Yaw45, Yaw135 and so on) and combinations of roll, pitch and yaw. If none of them fit, ArduPilot provides two general custom rotations, set through CUST_ROT1_ROLL/PIT/YAW and CUST_ROT2_ROLL/PIT/YAW.
The change applies on reboot, not immediately. Afterwards, re-level the vehicle (Accel Calibration → Calibrate Level): the old level reference was measured in the old orientation and is now wrong.
PX4
- Connect the flight controller in QGroundControl.
- Open Vehicle Setup → Sensors.
- Click Orientations at the bottom of the sensor list.
- Set Autopilot Orientation to match how the board is mounted, and click Ok.
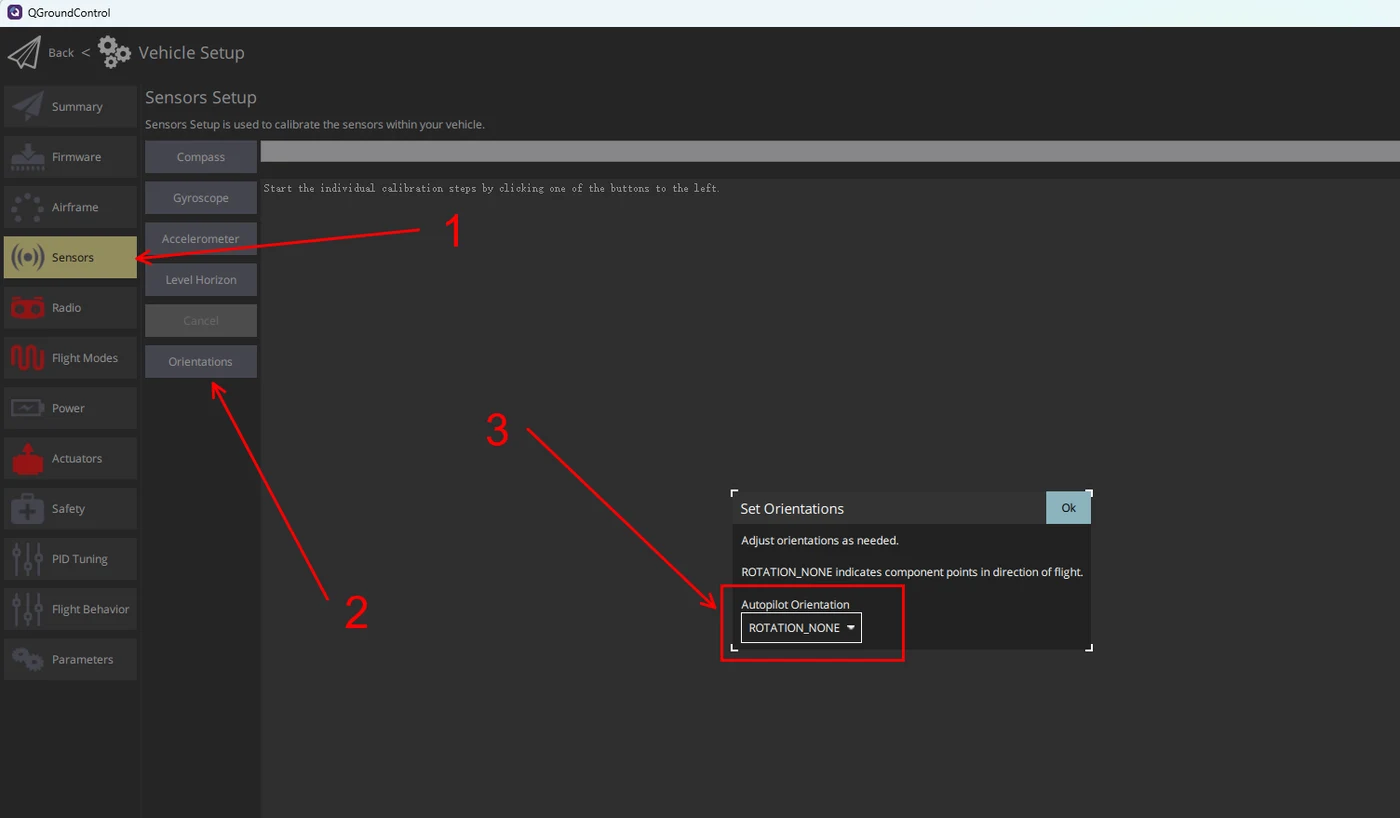
ROTATION_NONE means the board's arrow points in the direction of flight.
The same dialog can show Mag Orientation, which is for an external compass. They are unrelated: one rotates the IMU, the other rotates the magnetometer. Mag Orientation only appears when an external compass is connected, which is why the dialog looks different depending on what is plugged in.
INAV
INAV has a dedicated page with a 3D model, which makes it the easiest of the four to get right.
- Connect in the INAV Configurator.
- Open the Alignment Tool page.
- Adjust the roll, pitch and yaw sliders — or type values — until the on-screen model matches how the board actually sits in your aircraft.
- Click Save and Reboot.
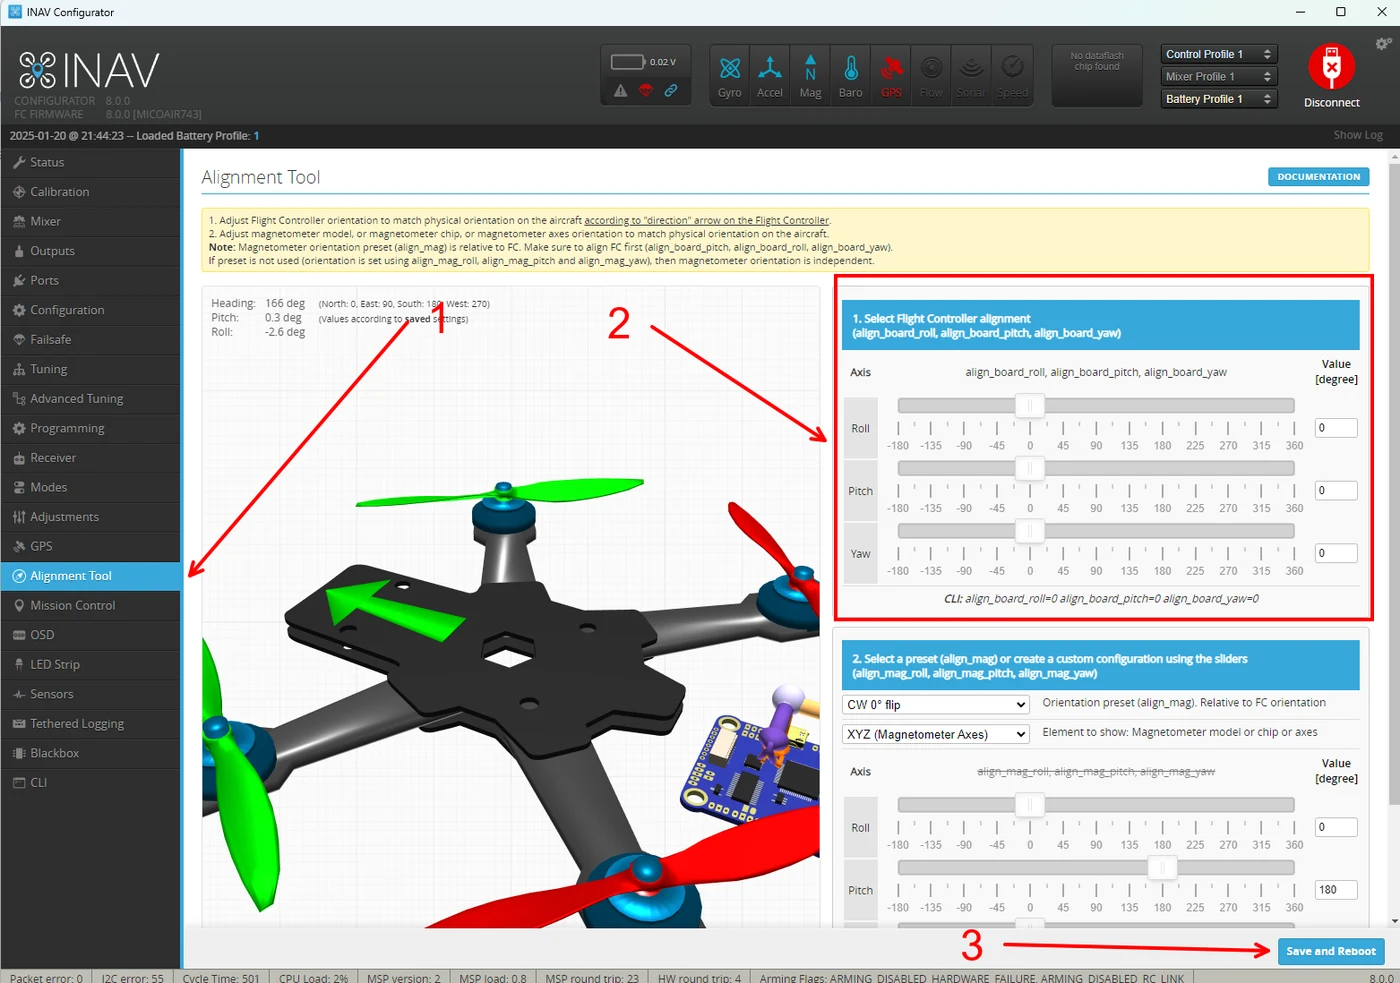
The settings behind the sliders are align_board_roll, align_board_pitch and align_board_yaw.
Betaflight
- Connect in the Betaflight Configurator.
- Open the Configuration page.
- Under Board and Sensor Alignment, enter Roll Degrees, Pitch Degrees and Yaw Degrees.
- Click Save and Reboot.
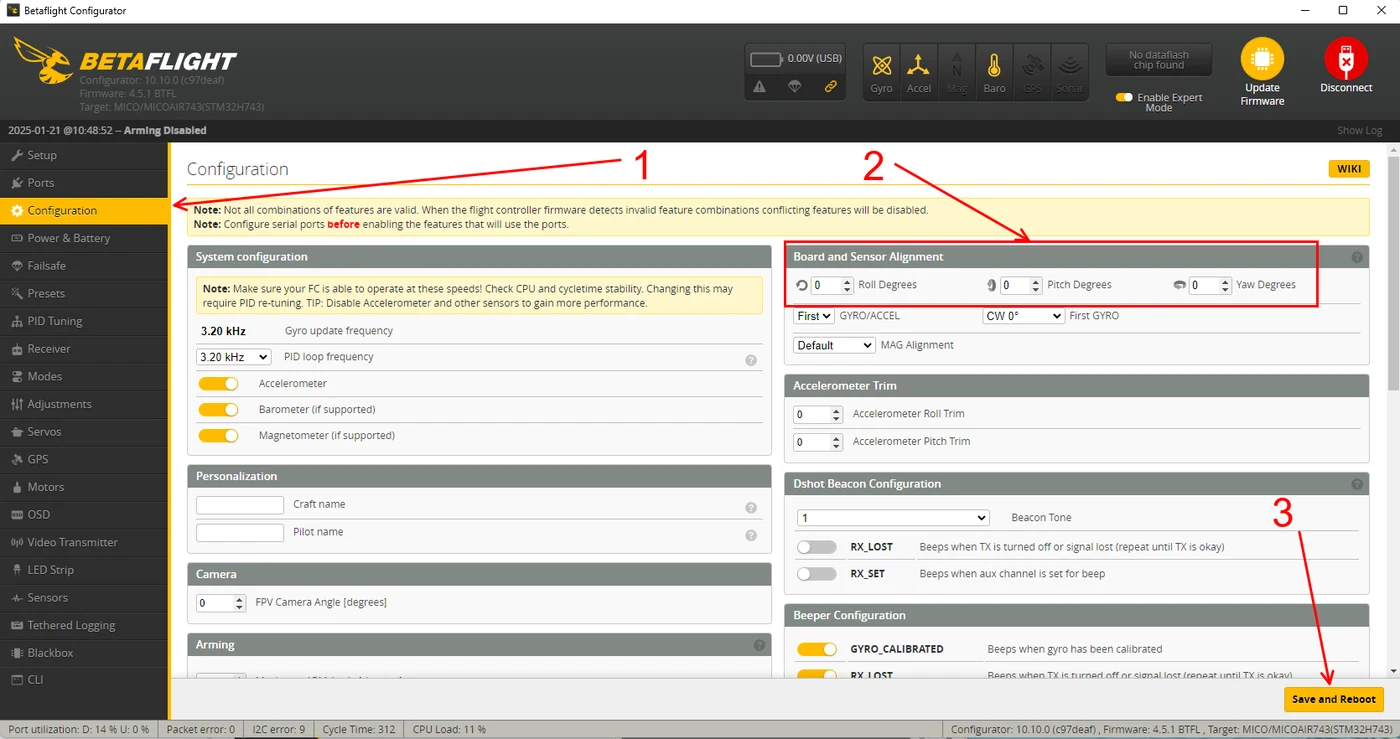
The setting names are the same as INAV's — align_board_roll, align_board_pitch, align_board_yaw — which leads directly to the next section.
Easily confused points
INAV and Betaflight use the same setting names with different units. In the INAV CLI, align_board_yaw is in deci-degrees: 90° is entered as 900. In the Betaflight CLI the same setting is in whole degrees: 90° is 90. The INAV Configurator's Alignment Tool displays degrees and converts for you, so the trap only bites in the CLI — or when copying a value out of a forum post written for the other firmware.
Board orientation is not compass orientation. Different hardware, different symptom, different parameter.
The arrow is the reference, not the USB port. Boards do not all put the connector on the same edge relative to the arrow.
Nothing happens until you reboot. All four firmwares apply this at the next boot.
Re-level after changing it. The accelerometer's level reference was taken in the old orientation.
"Upside down" needs a roll or pitch value, not a yaw one. Yaw alone cannot describe an inverted board — Roll180 and Pitch180 differ by which way the arrow ends up pointing.
Checking your work
Do this on the bench before you fly, with propellers off:
- Set the aircraft level and confirm the artificial horizon reads level.
- Pitch the nose down — the horizon should pitch down too, by about the same amount.
- Roll right — the horizon should roll right.
- Yaw the aircraft — the heading should follow, in the same direction.
If any axis moves the wrong way, or two axes are swapped, the orientation value is wrong. Fix it, reboot, re-level, and check again.
Related guides
- External Compass Orientation — the other orientation setting
- F405 V2 — Beginner ArduPilot Setup Guide
- Firmware Flashing Guide
- Drone GPS & Compass Guide
Written and maintained by the Robofusion engineering team.